I can’t believe it’s nearly the end of June! I cut out the fabric for June’s make at the very beginning but found myself actually constructing it towards the end of the month, assuming I still had loads of time. This month, it was back to knits.
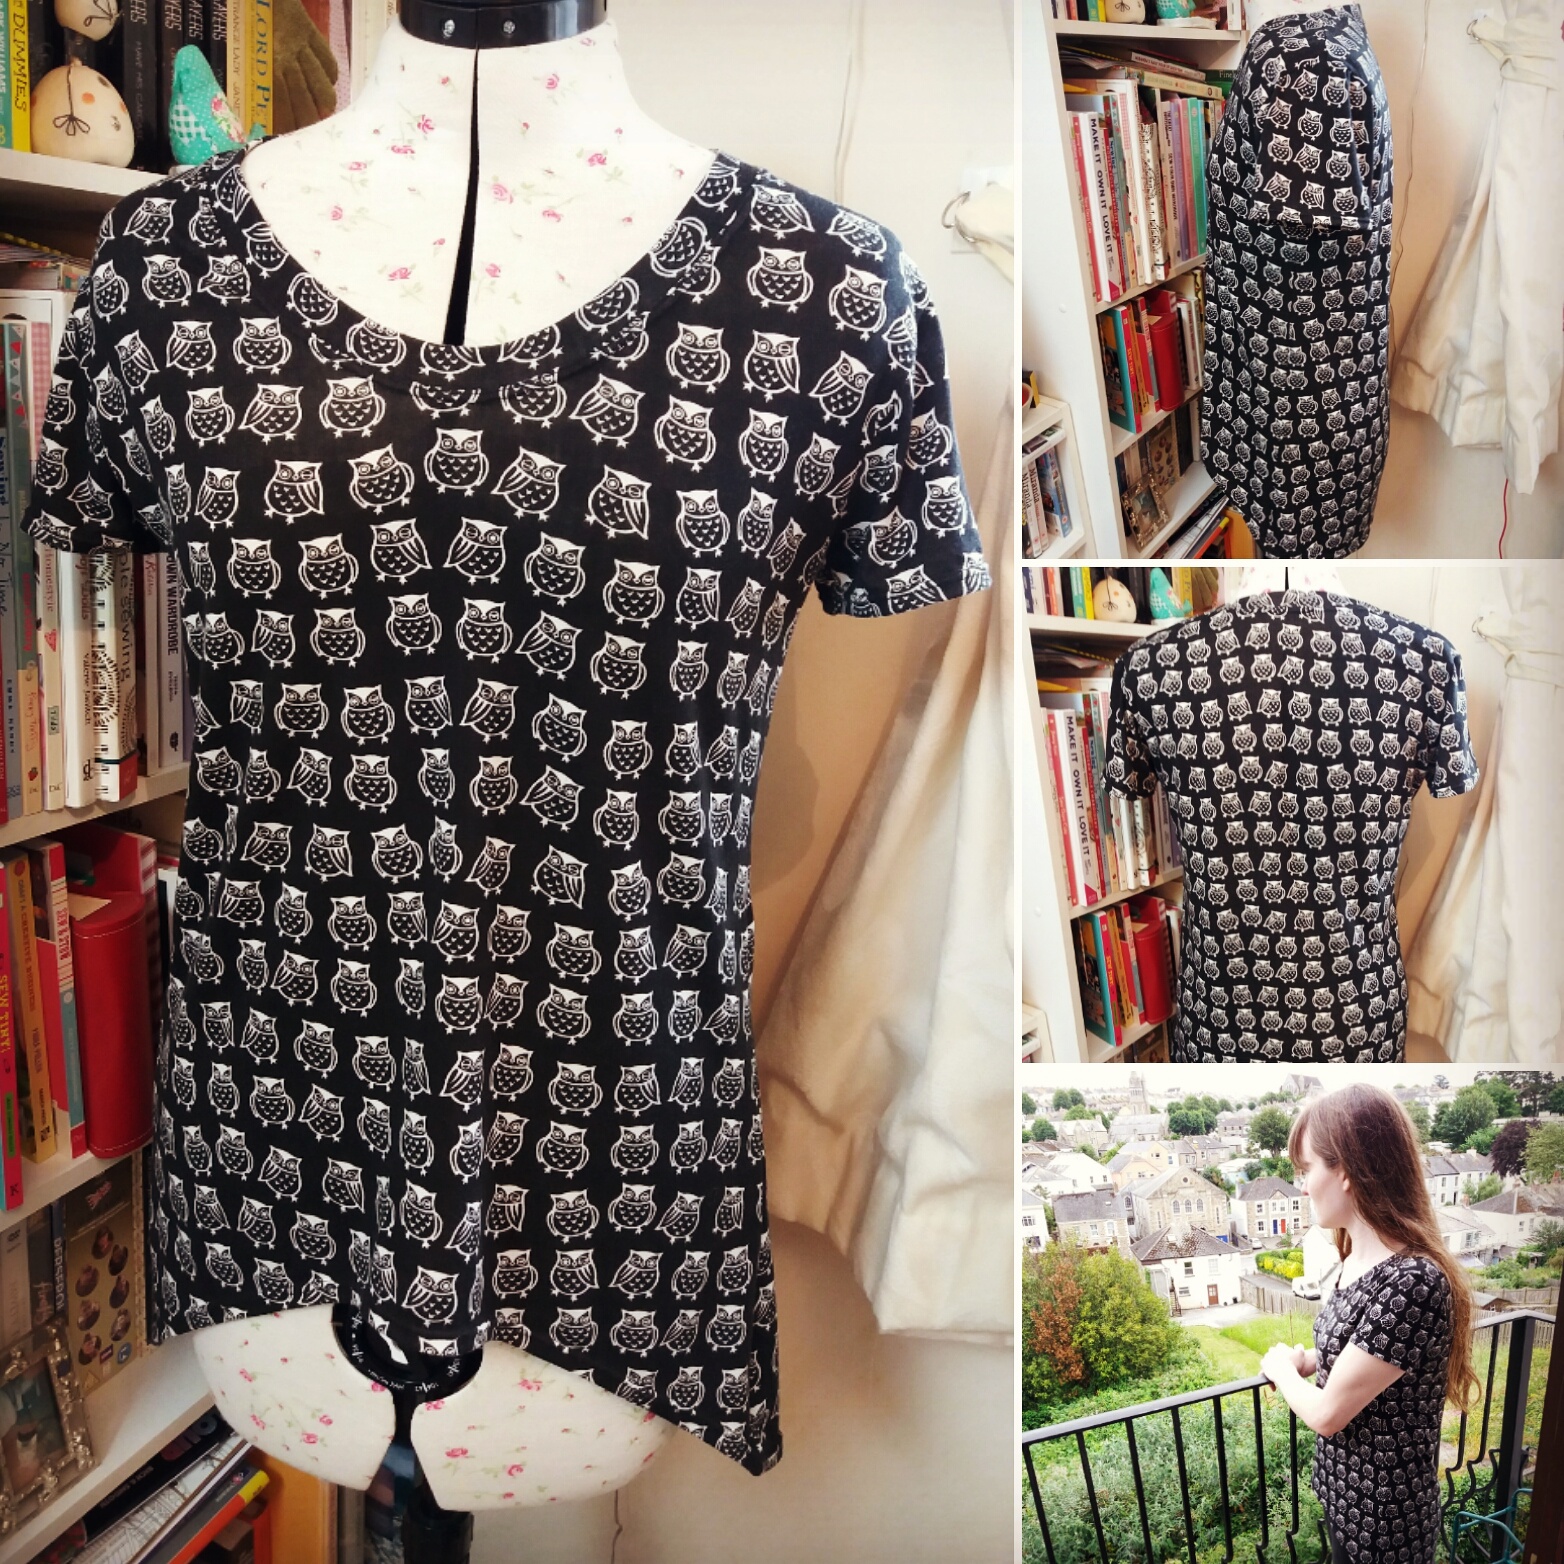
This month was the briar tee from Megan Nielsen’s patterns. I have had this lovely owl stretch fabric lined up for this month since January, so I was very excited to be finally using it.
I wasn’t completely convinced with the low back design but I wanted to give it a go. I like long tops with short sleeves, so it was very easy for me to decide on these variations. The pattern comes with 3 different sleeve lengths and a couple of hem lengths for the main part, so it really is a versatile pattern to have. It also explains that you can remove the curved hem if you wish.
As a newbie to necklines in knits, I went for the neckline band option, which is described in the pattern as the most common one to see on tops.
I’ve not had much luck in the past with twin needles either (I normally accidentally loosen it while I attach the walking foot to the machine so it ends up breaking). However, I trawled the internet for advice, and armed with stretchy fusible seam tape, my walking foot, a stretch 4.0mm twin needle and a sewing machine with an increased stitch length and upper thread tension to usual, I succeeded! Okay, it has tunneled a little, but it’s not too bad and has given the top a nice finish. I used my overlocker for all the seams so it was nice to simply leave the sewing machine set up for the twin needle hems.

Details
- Pattern name: Briar / MN2303
- Variation/Style: Version 3 without pocket (long version with short sleeves)
- Design House: Megan Nielsen Patterns
- Size I made: S
Fabric
Tshirt stretch knit fabric in black with white owl print from FabricLand.
Difficulty
For a pattern with stretch, I found this a suitable beginner level.
Clarity
I found the instructions very clear and did not struggle with any section. Megan Nielsen’s site also have wonderful guides on the main stages of the pattern if you require further assistance with a section.
I did look at the sewalongs to decide with neckline to opt for.
Fit
It fits perfectly for me – I was concerned as my fabric was stretchier than advised, but it hasn’t made it too big.
Design
Now I’ve made it, I like it. The tshirt has a round neckline and a curved hem, which scoops up at the front and curves down at the back. There are two optional pockets you can add too as well as two neckline finishes to choose from.
I chose short sleeves and the longer hem. I went for the neckline band rather than the neckline binding, as I have never tried either before.
Time Taken
This was a quick make. I made it in half a day but I suspect faster dressmakers could whip up a tshirt in a couple of hours.
Conclusion
This pattern is definitely up near the top out of the patterns I have made for this challenge. It caters for all seasons and it’s so useful to be able to make a laod of comfy tops.
